


Table of Contents
«A timeless reminder of your special day.»

Introduction
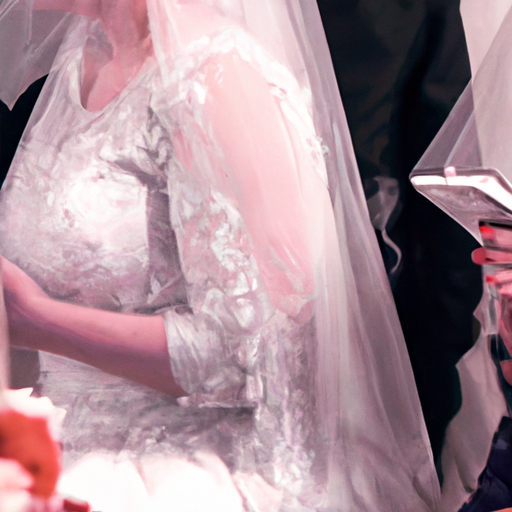
Wedding photos are a timeless way to capture the joy and love of a special day. Old wedding photos are especially special, as they provide a glimpse into the past and a reminder of the beauty of a couple’s special day. From the vintage dresses and suits to the classic poses and settings, old wedding photos are a wonderful way to remember the past and celebrate the present.
How to Restore and Preserve Old Wedding Photos
Wedding photos are a treasured reminder of a special day, and preserving them is essential for keeping the memories alive. Restoring and preserving old wedding photos can be a daunting task, but with the right tools and techniques, it can be done with ease.
The first step in restoring and preserving old wedding photos is to assess the condition of the photos. Look for signs of damage such as fading, discoloration, tears, and water damage. If the photos are in good condition, they can be cleaned with a soft cloth and a mild detergent. If the photos are in poor condition, they may need to be professionally restored.
Once the photos have been assessed and cleaned, they should be scanned and stored digitally. This will ensure that the photos are preserved for future generations. When scanning the photos, use a high-resolution scanner and save the images in a lossless format such as TIFF or PNG.
Once the photos have been scanned, they can be printed on archival-quality paper. This will ensure that the photos will last for many years to come. When printing the photos, use a high-quality printer and archival-quality inks.
Finally, the photos should be framed and displayed in a safe place. Use acid-free mats and UV-resistant glass to protect the photos from fading and discoloration.
Restoring and preserving old wedding photos is a labor of love, but the results are worth the effort. With the right tools and techniques, you can ensure that your wedding photos will be preserved for generations to come.
Creative Ways to Display Old Wedding Photos
1. Create a Collage: Gather all of your old wedding photos and arrange them in a collage. You can use a poster board or a canvas to create the collage. This is a great way to display all of your photos in one place.
2. Frame Them: Frame your favorite wedding photos and hang them on the wall. This is a great way to show off your special day and keep the memories alive.
3. Make a Scrapbook: Create a scrapbook with all of your wedding photos. You can add captions and other mementos to make it even more special.
4. Create a Photo Album: Put all of your wedding photos in a photo album. This is a great way to keep your photos organized and easily accessible.
5. Digital Photo Frame: Invest in a digital photo frame and upload all of your wedding photos. This is a great way to display your photos in a modern way.
6. Create a Photo Wall: Hang all of your wedding photos on the wall. This is a great way to create a focal point in your home and show off your special day.
7. Make a Shadow Box: Create a shadow box with all of your wedding photos. You can add other mementos such as your wedding invitation or a piece of your wedding dress to make it even more special.
8. Turn Them into Art: Have your wedding photos printed on canvas or wood. This is a great way to turn your photos into art and display them in a unique way.
The History of Wedding Photography Through the Ages
Wedding photography has been around for centuries, and its evolution has been shaped by the changing technology and trends of the times. From the earliest days of photography to the modern digital age, wedding photography has come a long way.
The earliest known wedding photographs were taken in the 1840s, shortly after the invention of the daguerreotype. These photographs were taken by Louis Daguerre, a French artist and inventor, and were the first photographs to be commercially available. These photographs were usually taken in a studio setting, with the couple posed in front of a painted backdrop. The quality of the images was limited by the technology of the time, and the photographs were often blurry and grainy.
In the late 1800s, the introduction of the dry plate process allowed for faster exposure times and improved image quality. This allowed photographers to take photographs outdoors, and the popularity of outdoor wedding photography began to grow. This was also the era when the first wedding albums were created, with photographs of the bride and groom, their families, and the wedding party.
The next major development in wedding photography came in the early 1900s with the introduction of the 35mm camera. This allowed photographers to take candid shots of the wedding, capturing moments that would have otherwise been missed. This was also the era when the first color photographs were taken, although color photography was not widely used until the 1950s.
The next major development in wedding photography came in the 1970s with the introduction of digital photography. Digital cameras allowed photographers to take higher quality images and to edit them on a computer. This allowed photographers to create more creative and unique images, and to capture moments that would have otherwise been missed.
Today, wedding photography has become an art form, with photographers using a variety of techniques to capture the beauty and emotion of the day. From traditional posed shots to candid moments, wedding photography has come a long way since its humble beginnings in the 1840s.
How to Digitize Old Wedding Photos
Digitizing old wedding photos is a great way to preserve memories and share them with family and friends. With the right tools and techniques, you can easily digitize your old wedding photos and keep them safe for years to come. Here are some tips for digitizing your old wedding photos:
1. Gather Your Supplies: Before you begin digitizing your old wedding photos, make sure you have the right supplies. You will need a scanner, a computer, and photo editing software. You may also want to invest in a photo-safe archival box to store your photos in.
2. Prepare Your Photos: Before you scan your photos, make sure they are clean and free of dust and dirt. If your photos are damaged, you may want to consider having them professionally restored before you scan them.
3. Scan Your Photos: Once your photos are clean and ready to go, you can begin scanning them. Make sure to scan your photos at a high resolution so that you can get the best quality image.
4. Edit Your Photos: Once you have scanned your photos, you can use photo editing software to enhance the images. You can adjust the brightness, contrast, and color of your photos to make them look their best.
5. Store Your Photos: Once you have digitized your photos, you can store them on your computer or an external hard drive. You may also want to consider printing out a few copies of your photos to keep in an archival box.
By following these steps, you can easily digitize your old wedding photos and keep them safe for years to come. With the right tools and techniques, you can preserve your memories and share them with family and friends.
Tips for Taking Great Wedding Photos with Vintage Cameras
1. Choose the Right Camera: When selecting a vintage camera for wedding photography, it is important to choose one that is in good working condition and has all the necessary features. Consider the type of film you will be using, the size of the camera, and the features it offers.
2. Prepare the Camera: Before using the camera, make sure to check that all the settings are correct and that the film is loaded properly. If you are using a manual camera, practice using it before the wedding day to ensure you are familiar with the controls.
3. Use the Right Film: When shooting with a vintage camera, it is important to use the right type of film. Choose a film that is compatible with the camera and has a good ISO rating for the lighting conditions.
4. Use a Tripod: Using a tripod will help to ensure that your photos are sharp and clear. It will also help to reduce camera shake and blur.
5. Take Test Shots: Before the wedding day, take some test shots to make sure the camera is working properly and that you are familiar with the settings.
6. Use Natural Light: Natural light is the best light for taking wedding photos with a vintage camera. Try to avoid using flash as it can create harsh shadows and can be too bright for the film.
7. Take Multiple Shots: When taking wedding photos, it is important to take multiple shots of each moment. This will help to ensure that you capture the best possible image.
8. Develop the Film: After the wedding, make sure to develop the film as soon as possible. This will help to preserve the quality of the images.
Following these tips will help you to take great wedding photos with a vintage camera. With a little practice and patience, you can create beautiful images that will last a lifetime.
Conclusion
The old wedding photo is a beautiful reminder of a special day that was shared between two people in love. It captures a moment in time that will never be forgotten and serves as a reminder of the joy and happiness that comes with marriage. The photo is a reminder of the importance of cherishing the moments we have with our loved ones and the importance of celebrating the love we share.


