

-
Table of Contents
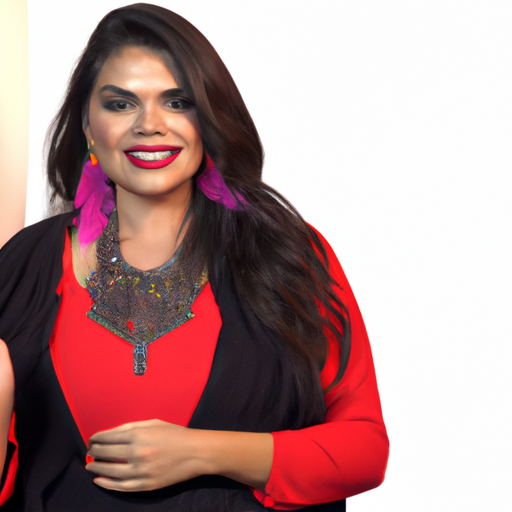
«Capture your best self with a great headshot – the perfect first impression!»
Introduction
Taking a great headshot photo can be a daunting task, but with the right knowledge and preparation, you can create a stunning portrait that will make you stand out from the crowd. Whether you’re a professional actor, model, or just want to look your best in a profile picture, there are a few key steps you can take to ensure your headshot looks its best. In this guide, we’ll cover the basics of how to take a great headshot photo, from choosing the right equipment and setting up the perfect lighting to selecting the right pose and background. With these tips, you’ll be able to create a headshot that will make you look your best.
How to Choose the Right Background for Your Headshot Photo
When it comes to headshot photography, the background is an important element that can make or break the final image. Choosing the right background for your headshot can help to create a professional and polished look that will make you stand out from the crowd. Here are some tips to help you choose the right background for your headshot photo.
1. Consider the purpose of the photo. Think about why you are taking the headshot and what message you want to convey. If you are taking a professional headshot for a job application, you may want to choose a neutral background that won’t distract from your face. If you are taking a headshot for a modeling portfolio, you may want to choose a more creative background that will help to showcase your personality.
2. Choose a background that complements your outfit. If you are wearing a bright color, choose a background that is a few shades darker. If you are wearing a dark color, choose a background that is a few shades lighter. This will help to create a balanced look and draw attention to your face.
3. Avoid busy backgrounds. Busy backgrounds can be distracting and take away from the focus of the photo. Choose a background that is simple and uncluttered so that the focus is on your face.
4. Consider the lighting. Make sure that the background is well lit so that it doesn’t appear too dark or too bright in the photo.
5. Think about the size of the background. If you are taking a close-up headshot, you may want to choose a smaller background so that it doesn’t take away from the focus of the photo. If you are taking a full-length headshot, you may want to choose a larger background so that it fills the frame.
By following these tips, you can choose the right background for your headshot photo and create a professional and polished look.
Tips for Posing to Get the Perfect Headshot
1. Stand Tall: Make sure to stand up straight and keep your chin up. This will help you look confident and create a strong presence in your headshot.
2. Relax Your Face: Avoid making any forced expressions and try to keep your face relaxed. This will help you look natural and approachable in your headshot.
3. Make Eye Contact: Make sure to look directly into the camera lens. This will help you create a connection with the viewer and make your headshot more engaging.
4. Show Your Personality: Don’t be afraid to show off your personality in your headshot. Whether it’s a slight smile or a confident smirk, adding a bit of your own flair can help make your headshot stand out.
5. Choose the Right Clothing: Make sure to wear clothing that is appropriate for the occasion and that flatters your body type. This will help you look professional and polished in your headshot.
6. Get the Right Lighting: Make sure to take your headshot in a well-lit area. Natural light is usually the best option, but you can also use a flash or studio lighting if needed.
7. Have Fun: Don’t be afraid to have fun with your headshot. Try different poses and expressions to find the one that best captures your personality.
Lighting Techniques for Capturing the Best Headshot
Headshots are an important part of any actor’s portfolio, and it is essential to capture the best possible image. To ensure that your headshot looks professional and captures your best features, there are a few lighting techniques that you should consider.
The first technique is to use a three-point lighting setup. This involves using three lights: a key light, a fill light, and a backlight. The key light is the main light source and should be placed in front of the subject, slightly to one side. The fill light should be placed on the opposite side of the key light and should be slightly lower in intensity. The backlight should be placed behind the subject and should be slightly higher in intensity than the fill light. This setup will create a well-lit image with a natural look.
Another technique is to use a butterfly lighting setup. This involves placing the key light directly in front of the subject and slightly above their head. The fill light should be placed on the opposite side of the key light and slightly lower in intensity. This setup will create a more dramatic look with the light highlighting the subject’s features.
Finally, you can use a loop lighting setup. This involves placing the key light directly in front of the subject and slightly above their head. The fill light should be placed on the same side as the key light and slightly lower in intensity. This setup will create a more natural look with the light wrapping around the subject’s face.
By using these lighting techniques, you can ensure that your headshot looks professional and captures your best features. With the right lighting setup, you can create a headshot that will help you stand out from the crowd.
How to Use Props to Enhance Your Headshot
Headshots are an important part of any actor’s portfolio, and using props can help to enhance the overall look and feel of the photo. Props can be used to add a sense of character to the photo, as well as to draw attention to the actor’s features. Here are some tips on how to use props to enhance your headshot:
1. Choose props that are relevant to the character you are portraying. If you are auditioning for a role as a doctor, for example, you might consider using a stethoscope or a lab coat in your headshot.
2. Consider the size of the prop. If the prop is too large, it may overwhelm the photo and take away from the focus on the actor.
3. Use props to draw attention to your features. For example, if you have striking eyes, you might consider using a pair of glasses to draw attention to them.
4. Use props to add a sense of character to the photo. If you are auditioning for a role as a musician, for example, you might consider using a guitar or a microphone in your headshot.
5. Consider the color of the prop. If the prop is too bright or too dark, it may clash with the background and take away from the focus on the actor.
By following these tips, you can use props to enhance your headshot and make it stand out from the crowd. Props can be a great way to add a sense of character and draw attention to your features, so make sure to use them wisely.
Editing Tips for Creating a Professional Headshot
1. Choose a Professional Photographer: It is important to select a photographer who has experience in taking professional headshots. Ask to see a portfolio of their work to ensure they have the skills and expertise to create a high-quality image.
2. Wear Professional Clothing: Choose clothing that is appropriate for the type of headshot you are taking. Avoid overly casual clothing and opt for something more professional.
3. Prepare Your Hair and Makeup: Make sure your hair and makeup are done professionally. This will help to create a polished look that will be suitable for a professional headshot.
4. Choose the Right Background: Select a background that is neutral and not too distracting. A plain wall or a solid color backdrop are both good options.
5. Practice Your Pose: Practice your pose in front of a mirror before the shoot. This will help you to feel more comfortable and confident in front of the camera.
6. Relax and Smile: Remember to relax and smile during the shoot. This will help to create a natural and friendly look in your headshot.
7. Review the Photos: Once the shoot is complete, review the photos with your photographer. This will help to ensure that you are happy with the final result.
Conclusion
Taking a great headshot photo requires careful planning and attention to detail. It is important to consider the lighting, background, and composition of the shot. Additionally, it is important to make sure the subject is relaxed and comfortable in order to capture a natural expression. With the right preparation and technique, you can create a stunning headshot that will help you stand out from the crowd.