Table of Contents
«Capture the Real You: Headshot Photography Done Right!»
Introduction
Headshot photography is a great way to capture a person’s personality and create a lasting impression. It is a great way to showcase a person’s unique features and create a professional look. Headshots are often used for business cards, websites, and other professional purposes. In this guide, we will discuss the basics of headshot photography, including tips on lighting, composition, and posing. We will also discuss the importance of editing and retouching your images to create the perfect headshot. With the right knowledge and practice, you can create stunning headshots that will make a lasting impression.
How to Choose the Right Lighting for Headshot Photography
Headshot photography is an important part of any actor’s portfolio, and the right lighting can make or break a successful headshot. When choosing lighting for headshot photography, there are several factors to consider.
First, consider the type of headshot you are taking. Different types of headshots require different lighting setups. For example, a close-up headshot will require a more focused light source than a full-body shot. Additionally, the type of light source you use will affect the look of the headshot. Natural light is often preferred for headshots, as it creates a softer, more natural look. However, artificial lighting can also be used to create a more dramatic look.
Second, consider the size of the space you are shooting in. If you are shooting in a small space, you may need to use a smaller light source to avoid shadows. Additionally, if you are shooting in a larger space, you may need to use multiple light sources to create a more even lighting.
Finally, consider the type of background you are using. If you are using a white background, you may need to use a brighter light source to ensure that the background does not appear too dark. On the other hand, if you are using a darker background, you may need to use a softer light source to avoid washing out the subject.
By considering these factors, you can ensure that you choose the right lighting for your headshot photography. With the right lighting, you can create a professional-looking headshot that will help you stand out from the competition.
Tips for Posing Your Subjects for Headshot Photography
1. Make sure your subject is comfortable: Before you start shooting, take the time to get to know your subject and make them feel at ease. Ask them questions about themselves and their interests, and make sure they are comfortable with the environment and the equipment.
2. Encourage natural expressions: Ask your subject to think of something that makes them happy or smile, and then capture that expression. Avoid having them pose in a forced or unnatural way.
3. Use props: Props can help to add interest to a headshot and make it more dynamic. Ask your subject to bring items that are meaningful to them, such as a favorite book or a musical instrument.
4. Direct your subject: Give your subject direction on how to pose and where to look. Ask them to tilt their head slightly, or to look off to the side.
5. Capture different angles: Take a variety of shots from different angles to capture different expressions and moods.
6. Use natural light: Natural light is the best for headshots, as it will create a softer, more flattering look. If you need to use artificial light, make sure it is diffused and not too harsh.
7. Have fun: Headshots don’t have to be serious all the time. Encourage your subject to have fun and be creative with their poses.
How to Capture Natural Expressions in Headshot Photography
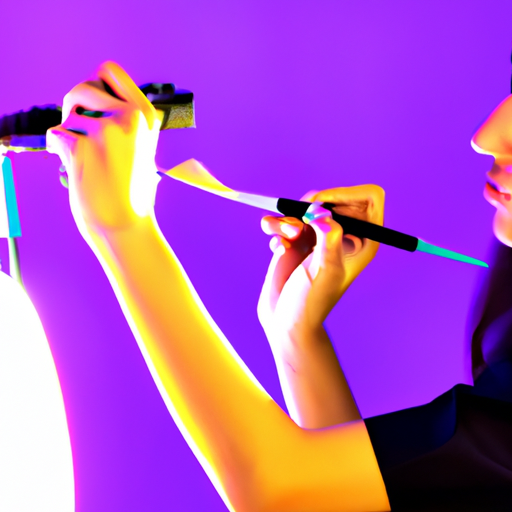
Headshot photography is an art form that requires skill and practice to master. Capturing natural expressions in headshots is essential for creating a successful portrait. Here are some tips to help you capture natural expressions in headshot photography.
1. Get to know your subject. Before you start shooting, take the time to get to know your subject. Ask them questions about their interests, hobbies, and passions. This will help you create a connection with them and make them feel more comfortable in front of the camera.
2. Use natural light. Natural light is the best light for headshots. It will create a softer, more natural look that will help bring out the subject’s features. If you’re shooting indoors, try to find a window with plenty of natural light.
3. Give direction. Once you’ve established a connection with your subject, give them direction on how to pose and what expressions to make. This will help them feel more comfortable and relaxed, which will result in more natural expressions.
4. Capture candid moments. Candid moments are often the most natural and authentic expressions. Try to capture moments when your subject isn’t aware of the camera. This will help you capture genuine expressions that will make your headshots stand out.
5. Have fun. Above all else, make sure you and your subject are having fun. This will help create a relaxed atmosphere and make it easier to capture natural expressions.
By following these tips, you’ll be able to capture natural expressions in headshot photography. With practice and patience, you’ll be able to create stunning portraits that will make your subjects look their best.
How to Use Props to Enhance Your Headshot Photography
Headshots are an important part of any actor’s portfolio, and props can be used to enhance the overall look and feel of the photograph. Props can be used to add depth and interest to a headshot, as well as to help tell a story about the actor. Here are some tips for using props to enhance your headshot photography.
1. Choose props that are relevant to the actor’s profession. Props should be chosen based on the actor’s profession and the type of headshot being taken. For example, if the actor is a musician, a guitar or other musical instrument may be a good choice. If the actor is a lawyer, a briefcase or a stack of books may be a good choice.
2. Choose props that are appropriate for the actor’s age. Props should be chosen based on the age of the actor. For example, a young actor may look better with a toy or a book, while an older actor may look better with a briefcase or a stack of books.
3. Choose props that are appropriate for the actor’s gender. Props should be chosen based on the gender of the actor. For example, a female actor may look better with a purse or a scarf, while a male actor may look better with a briefcase or a stack of books.
4. Choose props that are appropriate for the actor’s personality. Props should be chosen based on the personality of the actor. For example, a serious actor may look better with a briefcase or a stack of books, while a more outgoing actor may look better with a toy or a book.
5. Choose props that are appropriate for the background. Props should be chosen based on the background of the headshot. For example, if the background is a cityscape, a briefcase or a stack of books may be a good choice. If the background is a beach, a beach ball or a surfboard may be a good choice.
By following these tips, you can use props to enhance your headshot photography and create a more interesting and dynamic image. Props can be used to add depth and interest to a headshot, as well as to help tell a story about the actor.
How to Edit Your Headshot Photos for Maximum Impact
Headshots are an important part of any professional’s portfolio. They are often the first impression a potential employer or client has of you, so it is important to make sure they are of the highest quality. Editing your headshots can help you create a more polished and professional look. Here are some tips for editing your headshots for maximum impact.
1. Choose the right photo. Before you start editing, make sure you have chosen the right photo. Look for a photo that is well-lit and in focus. Avoid photos that are too dark or too bright, as these can be difficult to edit.
2. Adjust the exposure. Adjusting the exposure of your photo can help bring out the details and make it look more professional. Use the exposure slider to make subtle adjustments until you are happy with the look.
3. Adjust the white balance. White balance helps to ensure that the colors in your photo look natural. Use the white balance slider to adjust the colors until they look accurate.
4. Sharpen the image. Sharpening your photo can help make it look more crisp and professional. Use the sharpening slider to make subtle adjustments until you are happy with the look.
5. Add a vignette. Adding a vignette can help draw attention to the subject of your photo. Use the vignette slider to adjust the size and intensity of the vignette until you are happy with the look.
By following these tips, you can easily edit your headshots for maximum impact. With a few simple adjustments, you can create a professional and polished look that will make a great first impression.
Conclusion
Headshot photography is a great way to capture a person’s personality and create a lasting impression. To get the best results, it is important to use the right equipment, find the right lighting, and create a comfortable atmosphere for the subject. Additionally, it is important to take the time to get to know the subject and understand their needs and preferences. With the right preparation and attention to detail, headshot photography can be a rewarding and enjoyable experience for both the photographer and the subject.


